Claude (Web, Desktop, Cowork)
Use Val Town from Claude on the web or in the desktop app. If you use Claude in a terminal, follow the Claude Code guide instead.
Install the plugin
Claude plugins are available on paid plans. If you don’t see Plugins, use the custom connector option below.
- Open Claude, switch to "Chat and Cowork" mode (even if you typically use Code mode)
- Open Customize → Plugins.
- Search for Val Town in the plugin browser.
- Select Add.
Connect your Val Town account
After installing the plugin, you need to connect your account.
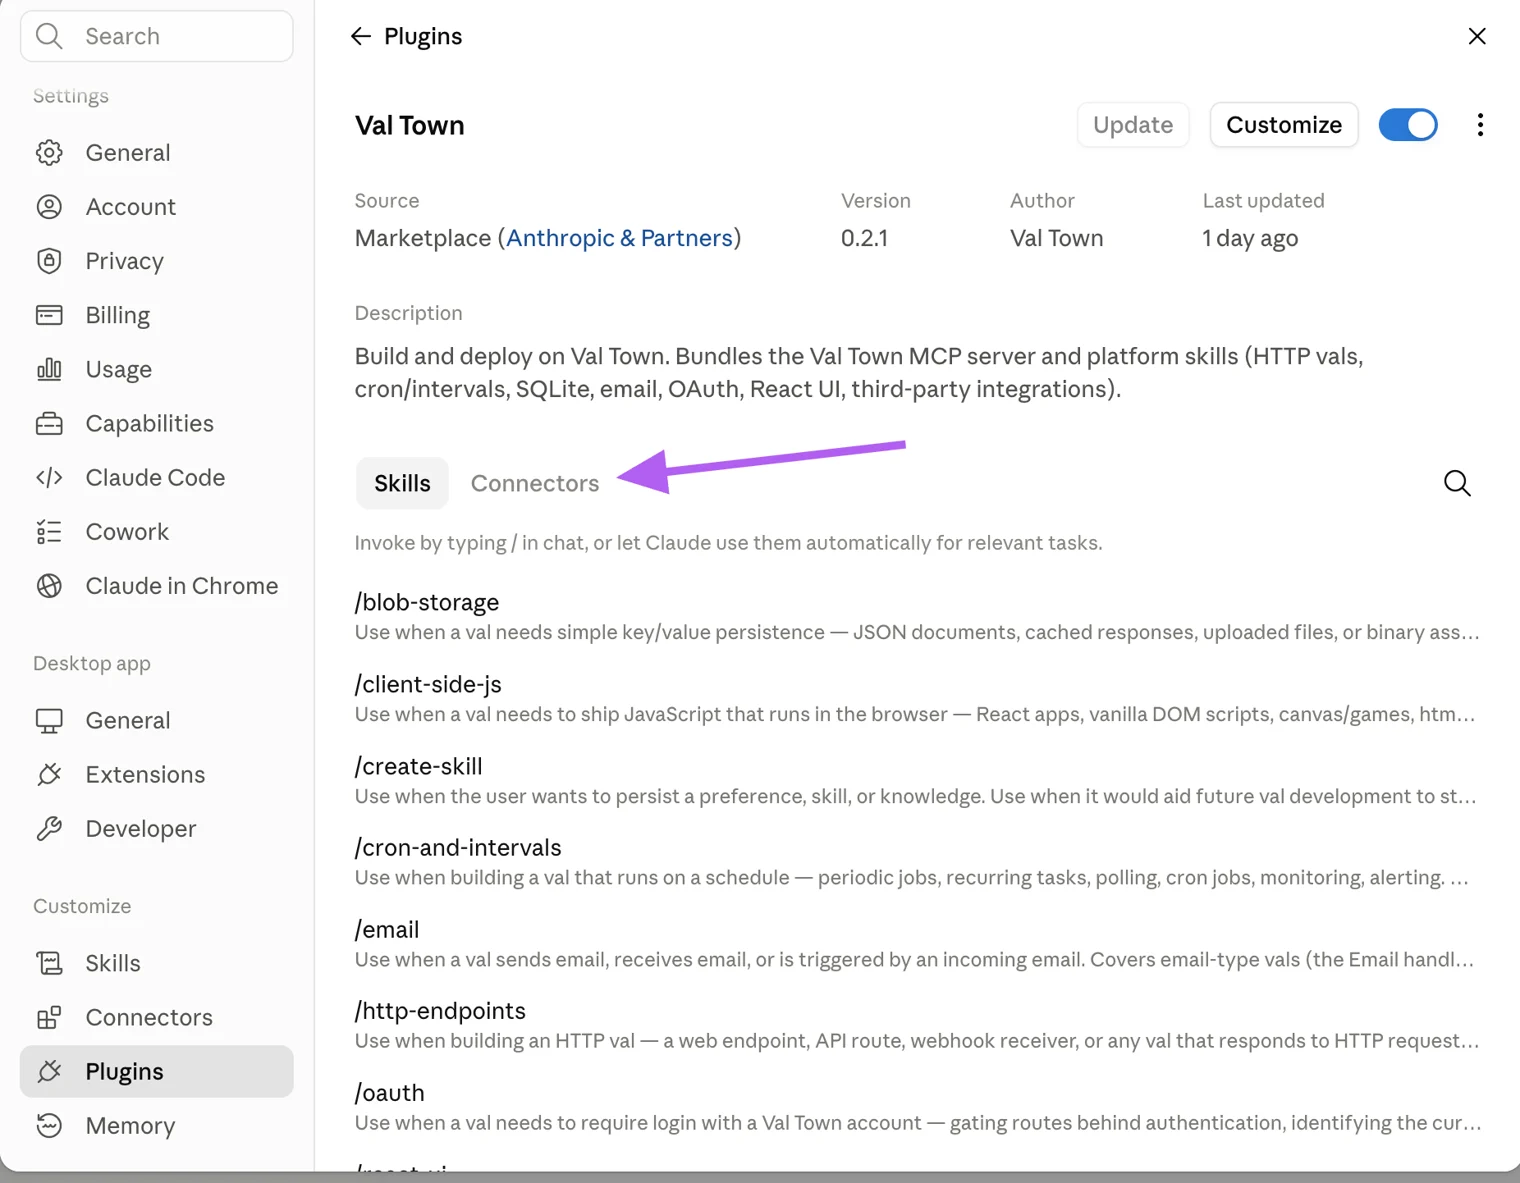
- Open the installed Val Town plugin. (Customize → Yours → Val Town)
- In its Connectors section, select the Val Town connector and click Connect.
- If an Add custom connector dialog appears, select Add.
- Select Connect for the Val Town connector.
- Sign in to Val Town and approve access.
Check the connection
Start a new chat or session after installation and send:
Use Val Town to list my vals. Don’t create or change anything.A response from Val Town listing your vals, even an empty list, confirms the connection. If the agent only explains how to list vals, ask it to use the Val Town tools.
Add a custom connector
Use this option if the plugin isn’t available. You only need one Val Town connection; skip this if the plugin’s connector is already connected.
- Open Customize → Connectors.
- Select + → Add custom connector.
- Enter Val Town as the name and copy this server URL:
https://api.val.town/v3/mcp- Leave the optional advanced OAuth fields empty.
- Select Add, then Connect.
- Sign in to Val Town and approve access.
- Start a new chat and run the connection check above.
This connects Val Town’s tools through MCP. The plugin also packages platform skills.
Troubleshooting
- Plugins aren’t available: use the custom connector option. Claude’s free plan allows a limited number of custom connectors; you may need to remove another connector or change plans.
- You can’t add a connector in a managed workspace: ask an owner or administrator to enable it.
- The plugin is installed but Val Town tools aren’t available: check its Connectors section and finish connecting your account.
- The connector is connected but an existing chat can’t see it: start a new chat and check that the connector is enabled for that chat. If the desktop app still shows old settings, quit and reopen it.
- You installed with a terminal command: Claude Code’s configuration doesn’t add a connector to Claude web or desktop. Follow the steps above.
Claude’s menu labels can change. See its current plugin instructions and connector instructions, or ask us for help.
Last updated