Supabase provide a hosted Postgres database with 500MB of storage in the free tier.
You can query and create data inside your vals using either Supabase’s JavaScript SDK, or a Postgres client.
Using the SDK
Section titled “Using the SDK”1. Sign up to Supabase
Section titled “1. Sign up to Supabase”Visit https://supabase.com/dashboard/sign-up.
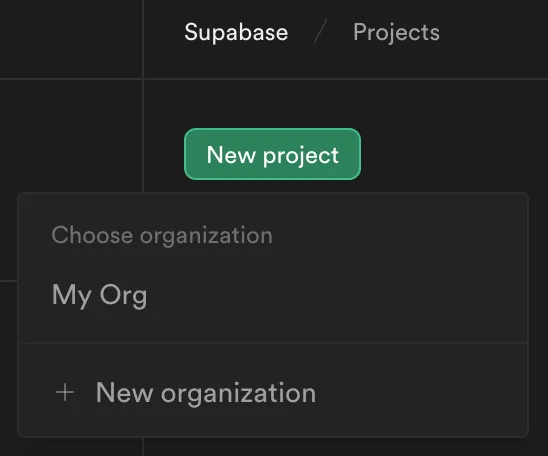
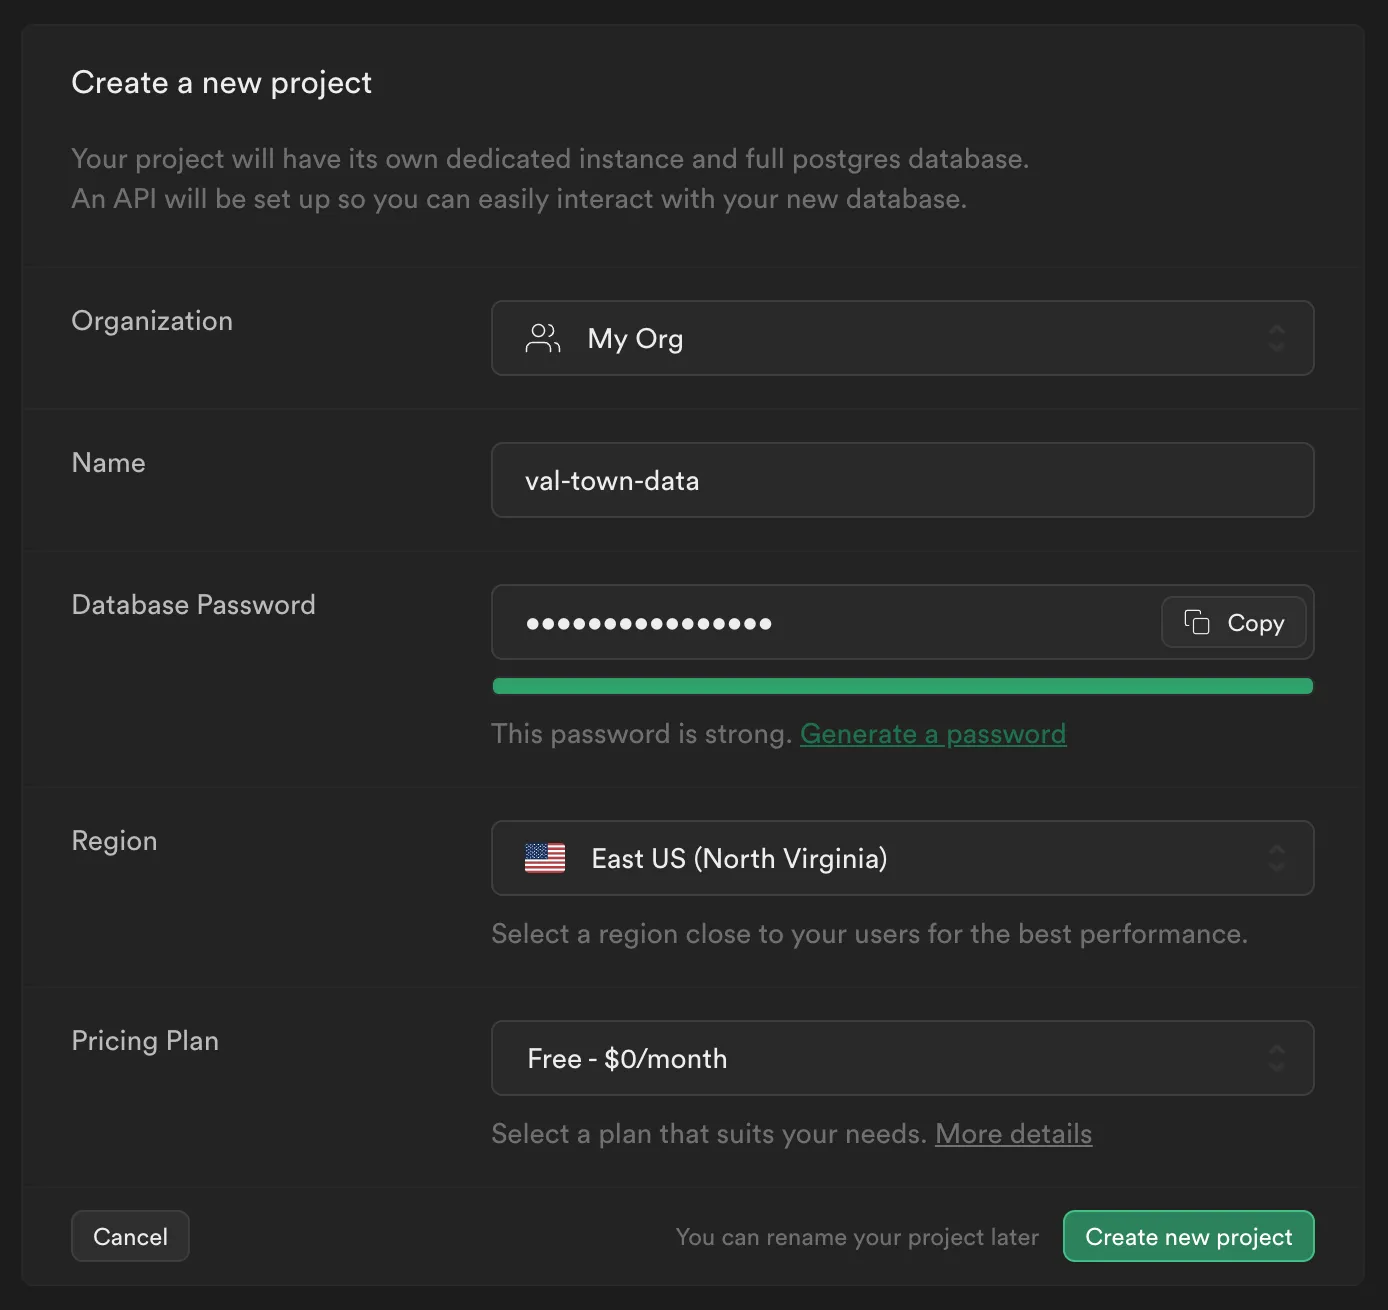
2. Create a project
Section titled “2. Create a project”On Supabase’s dashboard, create a new project.
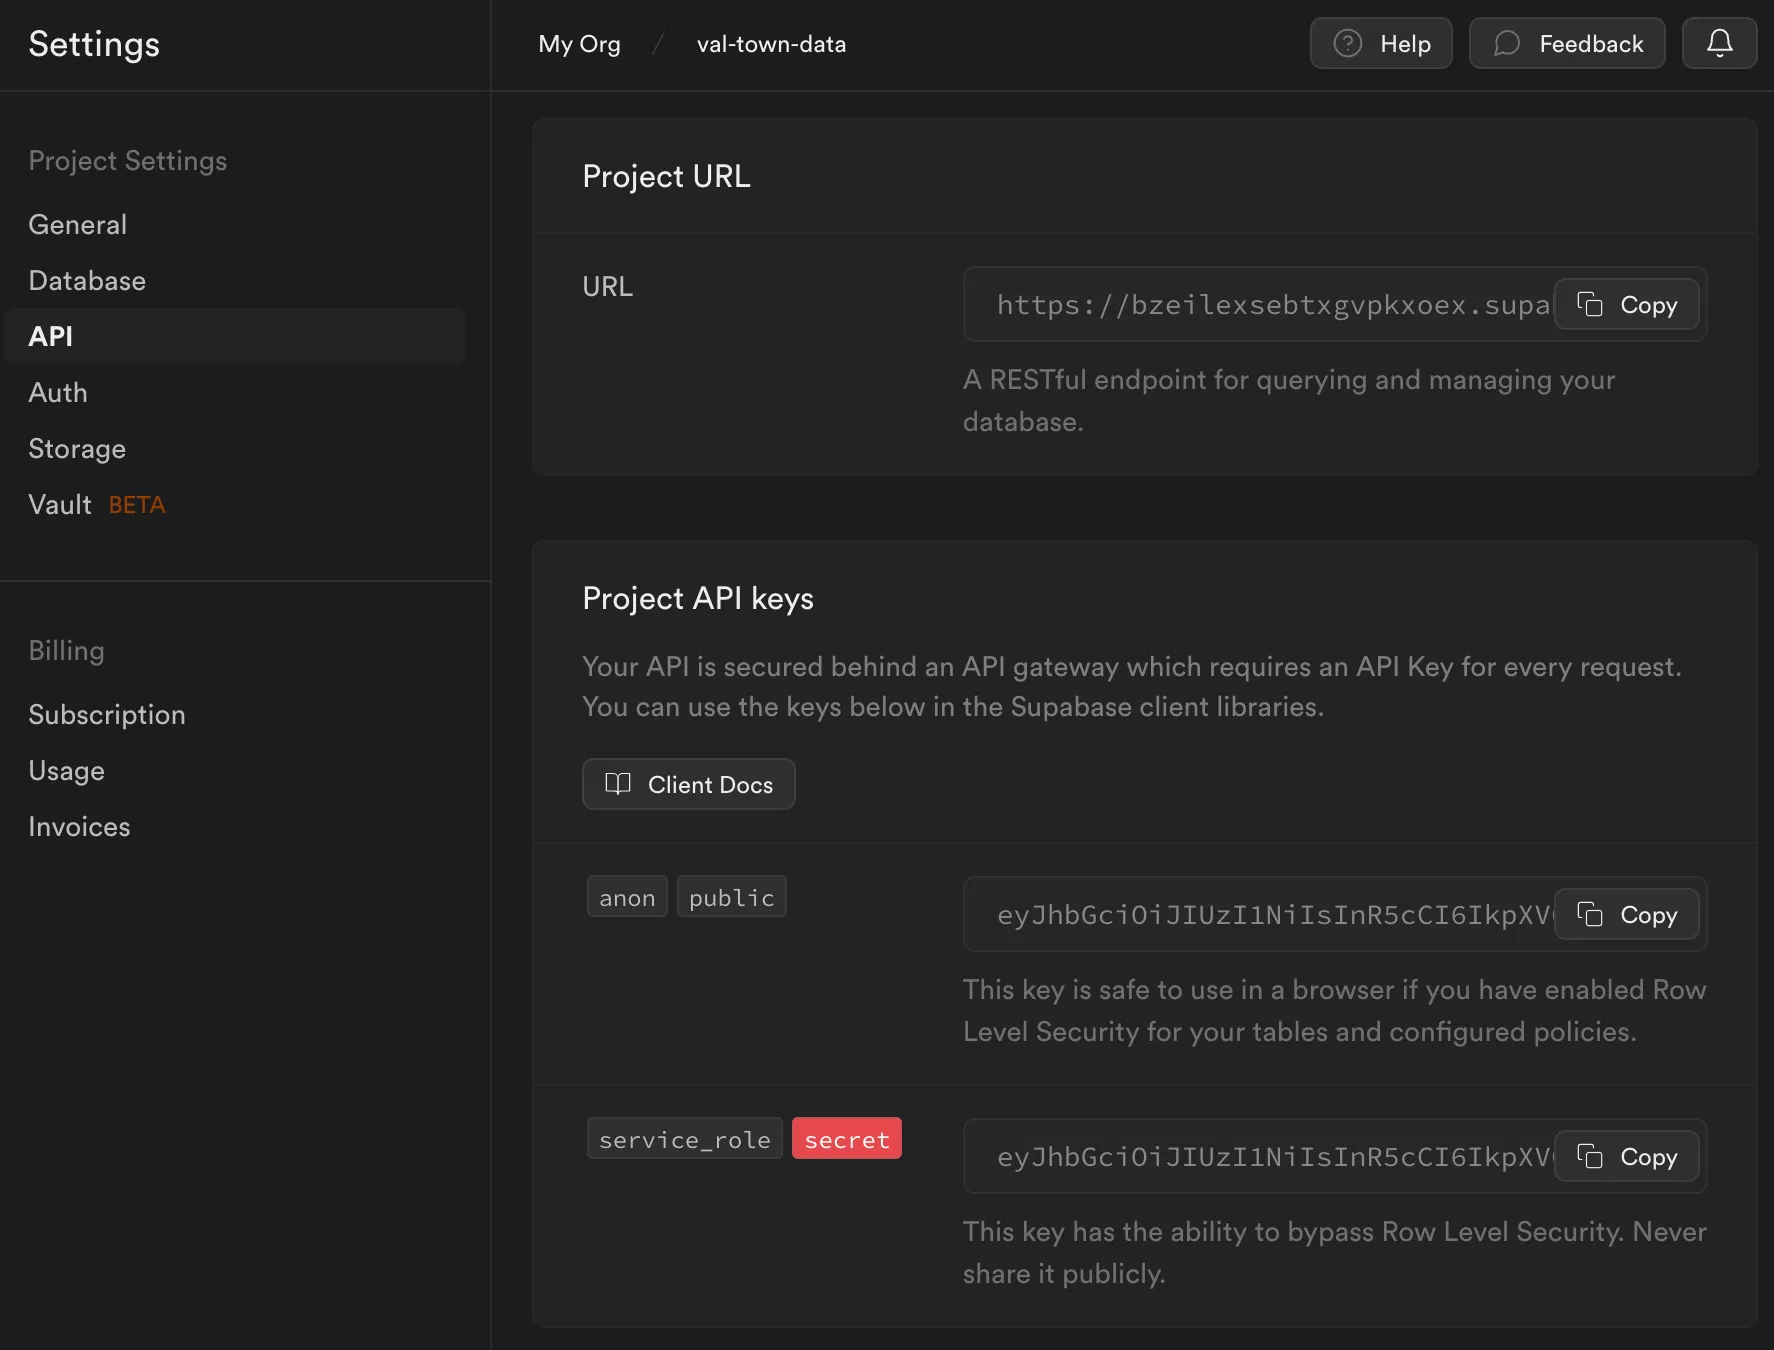
3. Get your API URL and service role key
Section titled “3. Get your API URL and service role key”Go to your project’s Settings via the sidebar. Inside API, scroll down
and copy the Project URL, and then, inside Project API Keys, copy the
service role secret. Save these as two separate
Val Town environment variables as supabaseURL and
supabaseKey respectively.
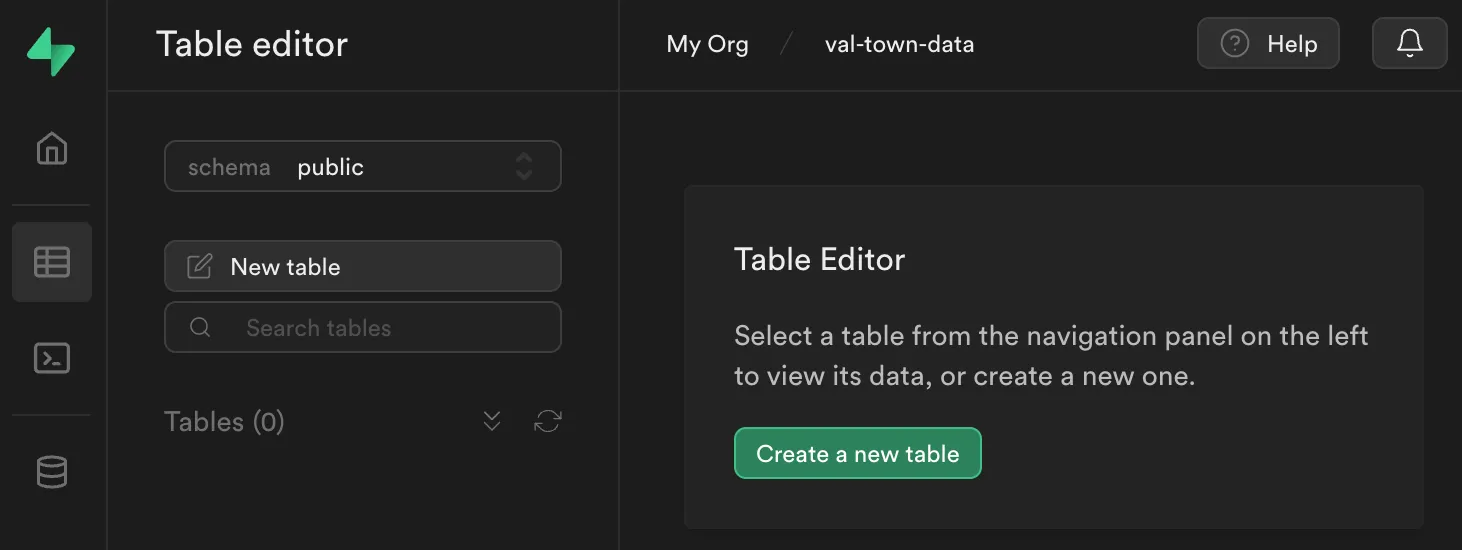
4. Create your first table
Section titled “4. Create your first table”Head to the Table editor in the sidebar.
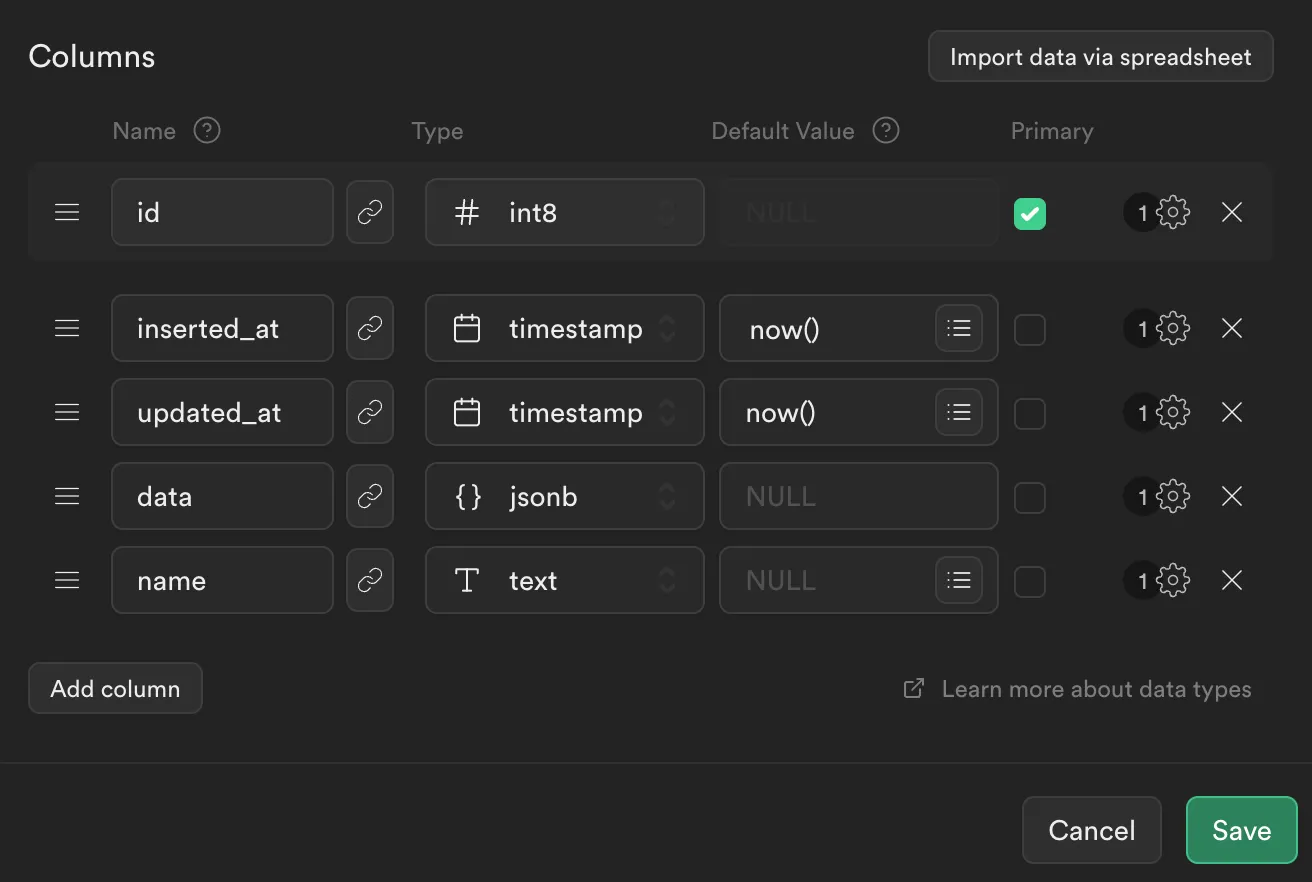
Create a new table called my_first_table with the following schema.
5. Insert some data
Section titled “5. Insert some data”Copy and paste the following val to insert some data.
import { createClient } from "https://esm.sh/@supabase/supabase-js@2";
const supabase = createClient(  Deno.env.get("supabaseURL"),  Deno.env.get("supabaseKey"));const { data, error } = await supabase  .from("my_first_table")  .insert({ name: "Alice", data: { job: "software engineer" } });console.log(data, error);
6. Query back that data
Section titled “6. Query back that data”Get back the data you just inserted by using eq() (like SQL’s WHERE).
import { createClient } from "https://esm.sh/@supabase/supabase-js@2";
const supabase = createClient(  Deno.env.get("supabaseURL"),  Deno.env.get("supabaseKey"));const { data, error } = await supabase  .from("my_first_table")  .select("name, data")  .eq("name", "Alice")  .limit(1);if (error) {  throw error;}console.log(data);
7. Keep going!
Section titled “7. Keep going!”Use Supabase’s JavaScript Client library documentation to write more queries!
Using a Postgres client
Section titled “Using a Postgres client”1. Sign up to Supabase
Section titled “1. Sign up to Supabase”Visit https://supabase.com/dashboard/sign-up.
2. Create a project
Section titled “2. Create a project”On Supabase’s dashboard, create a new project.
Keep a note of your database password, you’ll need this to create a database connection string.
3. Get your database’s connection string
Section titled “3. Get your database’s connection string”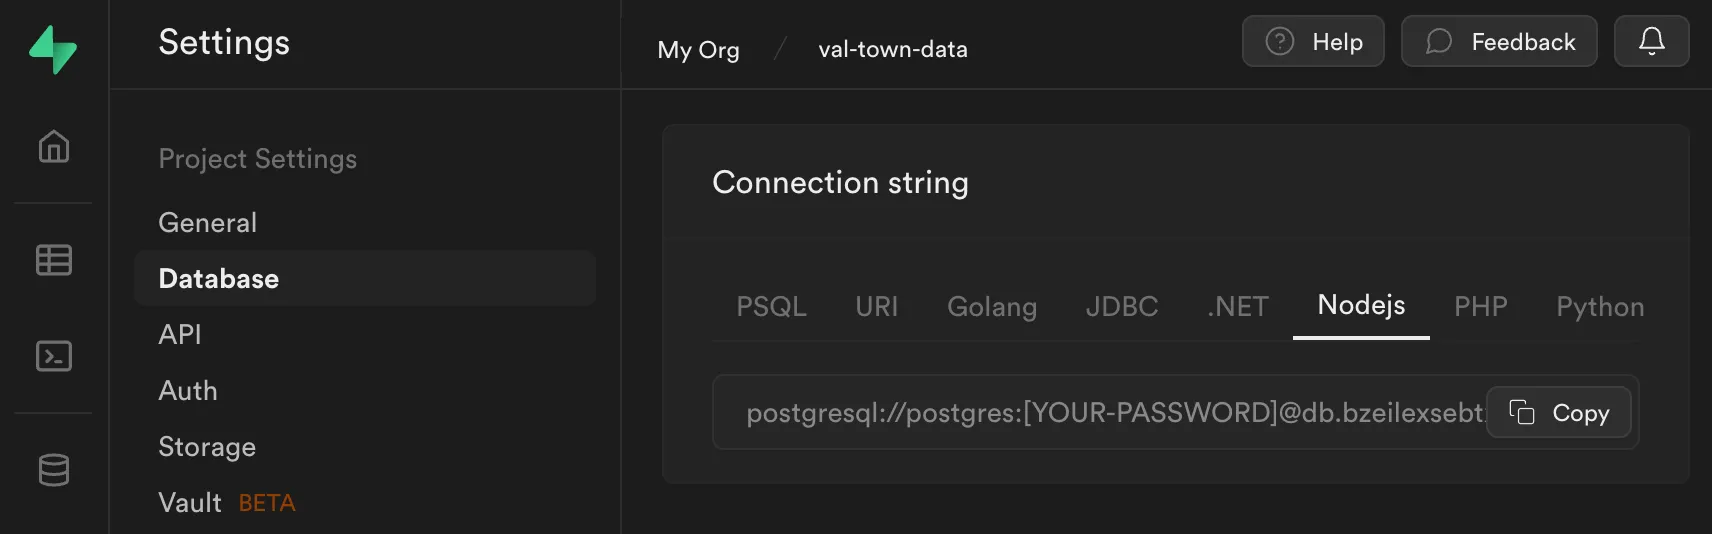
Go to your project’s Settings via the sidebar. Inside Database, scroll
down and copy the Connection string for Nodejs. Replace
[YOUR-PASSWORD] (removing the square brackets) with your database password
(alternatively, reset your database password to create a new one).
Save this connection string as a
Val Town environment variable as supabasePostgres.
4. Create your first table
Section titled “4. Create your first table”Copy and paste this val to create a table with the given schema.
import { supaBaseQuery } from "https://esm.town/v/vtdocs/supaBaseQuery";
await supaBaseQuery(  Deno.env.get("supabasePostgres"),  `create table my_first_table (  id bigint generated by default as identity primary key,  inserted_at timestamp with time zone default timezone('utc'::text, now()) not null,  updated_at timestamp with time zone default timezone('utc'::text, now()) not null,  data jsonb,  name text);`);
5. Insert some data
Section titled “5. Insert some data”Use a prepared statement like below to prevent SQL injection.
import { supaBaseQuery } from "https://esm.town/v/vtdocs/supaBaseQuery";
await supaBaseQuery(  Deno.env.get("supabasePostgres"),  `INSERT INTO MY_FIRST_TABLE (NAME, DATA) VALUES ($1, $2);`,  ["Alice", '{"job": "software engineer"}']);
6. Query back that data
Section titled “6. Query back that data”Usually, you’ll just want the rows property from the response.
import { supaBaseQuery } from "https://esm.town/v/vtdocs/supaBaseQuery";
const data = await supaBaseQuery(  Deno.env.get("supabasePostgres"),  `SELECT NAME, DATA FROM MY_FIRST_TABLE WHERE NAME = $1;`,  ["Alice"]);console.log(data);
7. More resources
Section titled “7. More resources”Learn more about the Deno Postgres client used in this guide, view the Supabase Database documentation, or get help on Val Town’s Discord.